DIY Guide: How to Fix a Leaking Tap

A dripping tap can be quite frustrating and can lead to significant water wastage and expenses if not fixed. However, you don’t necessarily require a plumber to deal with this common household issue. With some basic tools and a bit of knowledge, you can easily tackle the task yourself and save both water and money. How to fix a leaking tap – step by step guide —
Step 1: Turn Off the Water Supply
When you have a leaky faucet, the first step is to cut off the water supply to the affected tap. This is an essential step that will prevent further water damage to your home. In most modern setups, isolation switches are located beneath the sink or basin. They are usually labelled and easy to operate. All you need to do is turn them off.
However, you may need to locate the mains in older homes and shut off the water supply. The main shut-off valve for water can usually be found in one of three locations – outside near the front curb or water meter, inside the home near the water heater or garage, or on the perimeter of the house. To locate it, follow the incoming water line up to the meter, and you will likely find a red or green handle or knob.
If you are not confident locating and turning off the mains, it is best to call a professional.
Remember to prioritise safety when attempting repairs. Turn off the electricity in the area before beginning any work. Wear protective gear such as gloves and safety glasses to protect yourself from potential hazards. Always take necessary precautions before attempting any repairs to avoid accidents or injuries.
Step 2: Release Pressure
After turning off the water supply, it is important to release any residual pressure in the system. You can do this by opening a tap elsewhere in your home and letting it run until the pressure dissipates.
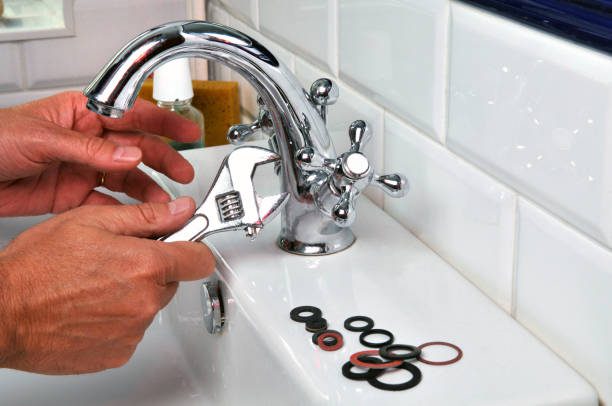
Step 3: Disassemble the Tap
Now that you’ve ensured there’s no water running, it’s time to disassemble the tap. Begin by removing the tap handles. Remember the golden rule: “Lefty loosey, righty tighty.” Use the appropriate tools, such as a shifter or wrench, to loosen the nuts securing the handles.
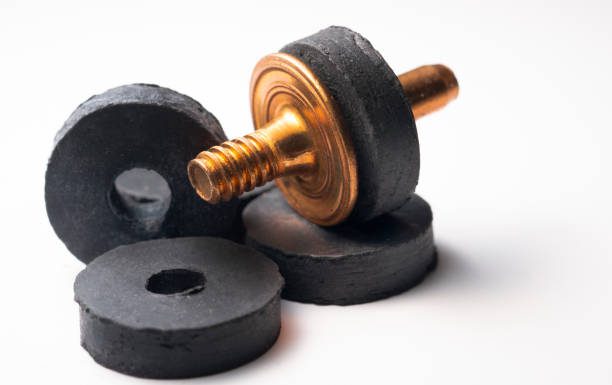
Step 4: Inspect and Replace Washers
Once you’ve removed the tap handles, inspect the washers for signs of wear and tear. Over time, washers can degrade, leading to leaks. If you notice any damage or deterioration, it’s time for a replacement. Carefully remove the old washers and replace them with new ones, ensuring a snug fit.
Step 5: Lubricate Moving Parts
It is recommended to lubricate the moving parts of your tap to ensure that it operates smoothly and to prevent any potential future leaks. You can use a plumber’s grease or lubricant that is specifically designed for plumbing fittings. Apply a small amount of the lubricant to the spindle and other relevant components to reduce friction and improve functionality.
Step 6: Clean and Reassemble
Before reassembling the tap, take the opportunity to clean any accumulated grime or debris. Use a thread-cleaning tool to ensure a tight seal between components. Once everything is clean and in good condition, carefully reassemble the tap, tightening the nuts by hand.
Step 7: Test and Monitor
With the tap reassembled, turn the water supply back on and test for leaks. Pay close attention to any signs of dripping or moisture around the tap. If everything looks good, congratulations! You’ve successfully fixed the leak. However, it’s essential to monitor the tap over the next few days to ensure the issue doesn’t recur.
Conclusion
Fixing a leaking tap may appear to be a challenging task, but with the proper guidance and tools, it can be a DIY project that you can undertake yourself. By following the steps below, you can quickly resolve the issue, save water and money, and avoid the inconvenience of calling a plumber. Remember, regular maintenance can significantly contribute to the smooth functioning of your home.
Call 0474 318 136
Or fill in the form below and we’ll call you back.